Lets3dPrint
1.7 Coming next: one fit for every hole, holes for inserts, nuts and magnets

For people who print at home

Most failed prints are not slicer problems. The lid is too tight, the hole too small, the text too thin, the round edge on the bed droops. Lets3dPrint is CAD that knows these tricks and does them in the design, so the part is right before it reaches the slicer.

macOS 26 or later · Apple silicon · Modelling and the parts library are free; export, Print Check, textures and scripts with Pro

Your nozzlechecked in every wall
Your printerits bed under the model
No accountoffline, files in Finder
$6.99a year for Pro

It goes together

Clearance, built into the tools

A printed hole comes out smaller than you drew it, and two printed parts need a gap to slide. Here the gap is part of the tool, so you set it once instead of guessing on every part.

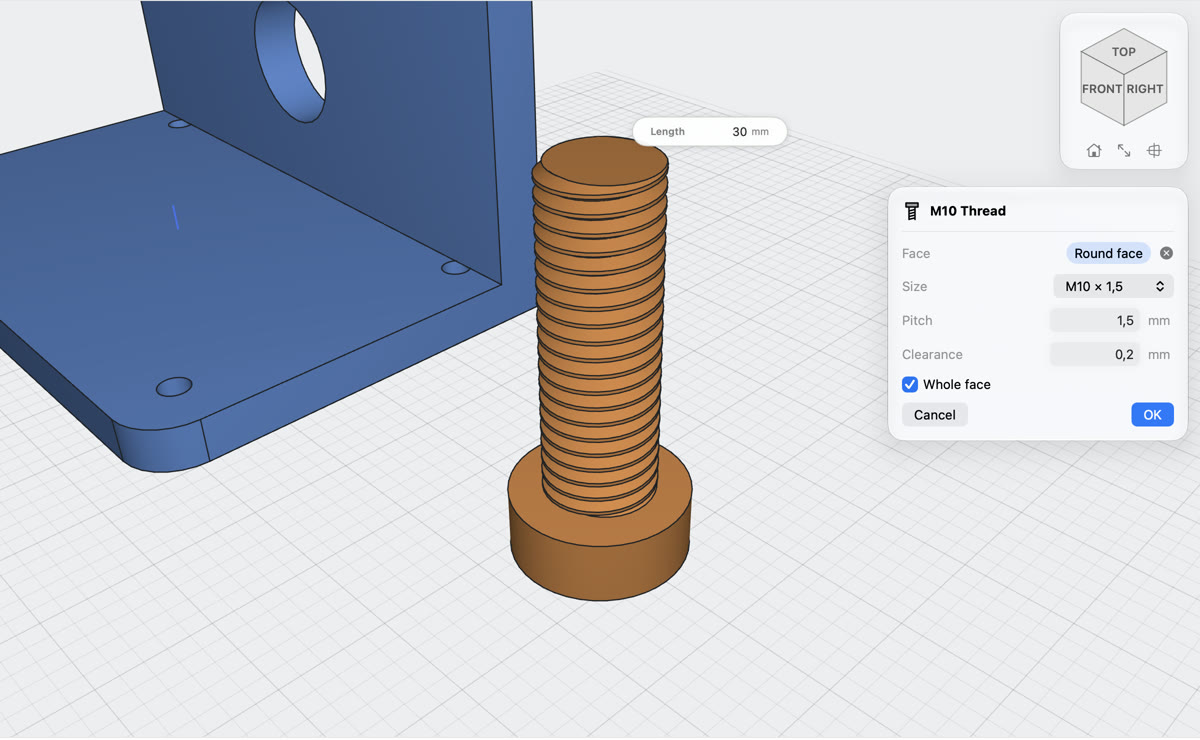
A bolt and a nut with metric threads, the Thread dialog with size and clearance
Thread · free

Threads that actually turn

Click a round face, pick the size. Metric threads from M2 to M30, outside on a rod or inside a hole, with extra room for printing (0.2 mm to start, yours to change).

  • The size that fits the rod or the hole is picked for you
  • Jars and caps from the library already have them
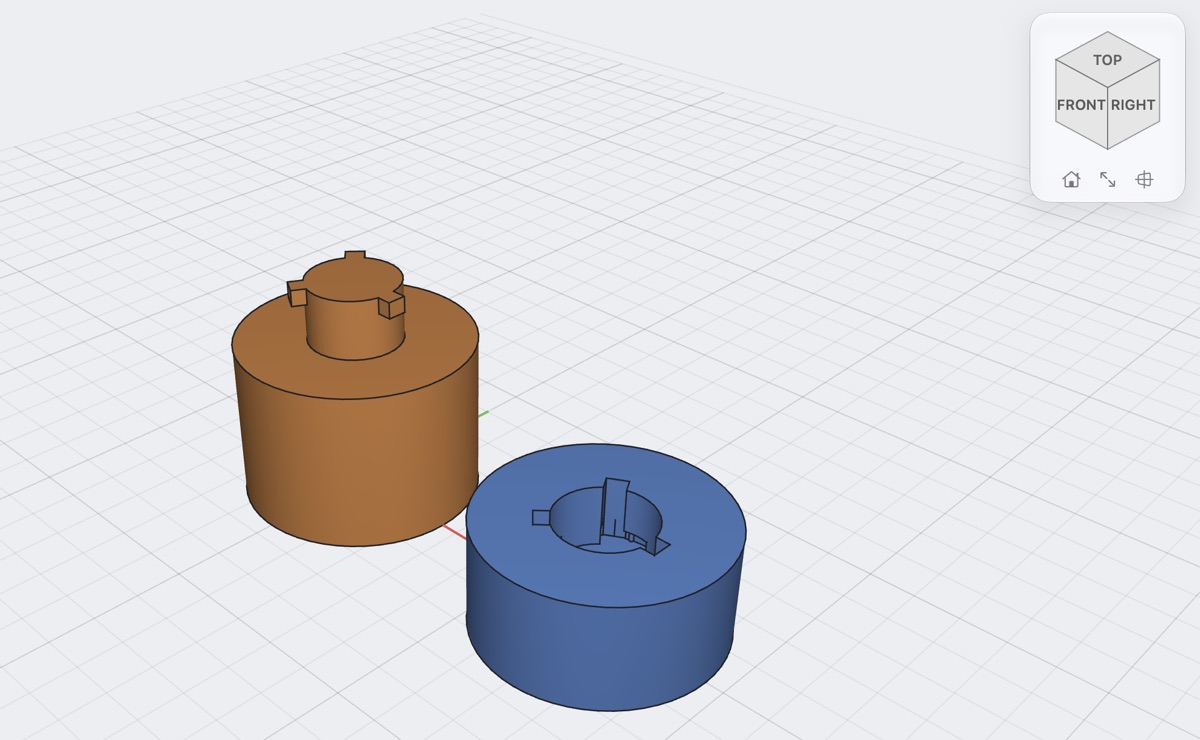
A canister split with a twist lock, the lid turned over to show its socket
Joint Split · Twist lock · free

Pieces that slide together

Split a part along a sketch and the pieces get jigsaw or dovetail locks with the clearance cut in (Tight, Normal, Loose). Or split it with a plane and join it again with a lock you push in and turn.

Find your own number

The Fit test in the library prints five holes, each a step looser, and pegs to try in them. The loosest snug fit is your printer's clearance.

Holes on their side

A sideways hole sags at the top. Pick Teardrop or Flat roof and it prints without support.

Counterbores on the bed

A counterbore that opens downwards gets a one-layer bridge, so the printer has something to lay the screw seat on.

It prints

See the problem before the slicer does

Thin walls, overhangs, a part off the bed, the first layer squeezing out: usually you find them in the layer preview and go back to CAD. Here they show up while you design, on the part itself.

Print Check marking a fin too thin for a 0.4 mm nozzle and a gap too narrow
Print Check · Pro

Every wall against your nozzle

Set the nozzle and layer height. Walls too thin to print, walls only one line thick, gaps that will close or fuse: marked on the model, worst first, with a button that turns the view to each one.

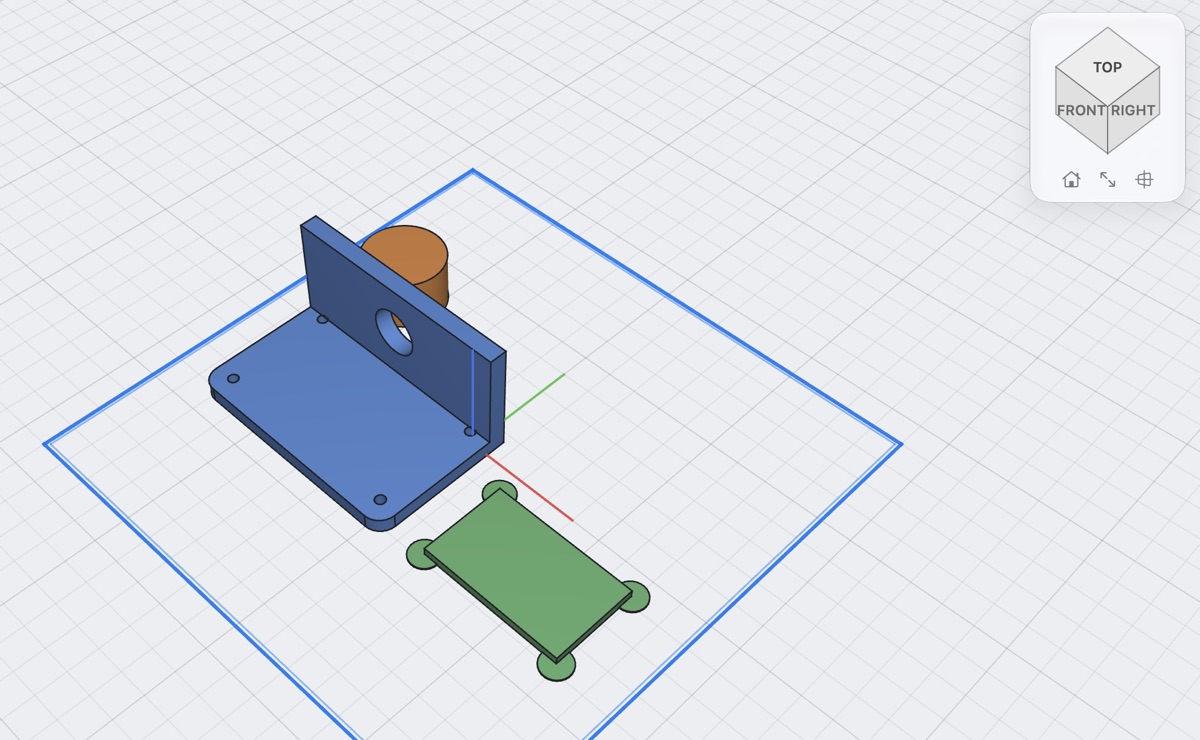
A bracket, a knob and a tag with brim ears arranged on the outline of a printer's bed
Bed · free

Your printer's bed, in the design

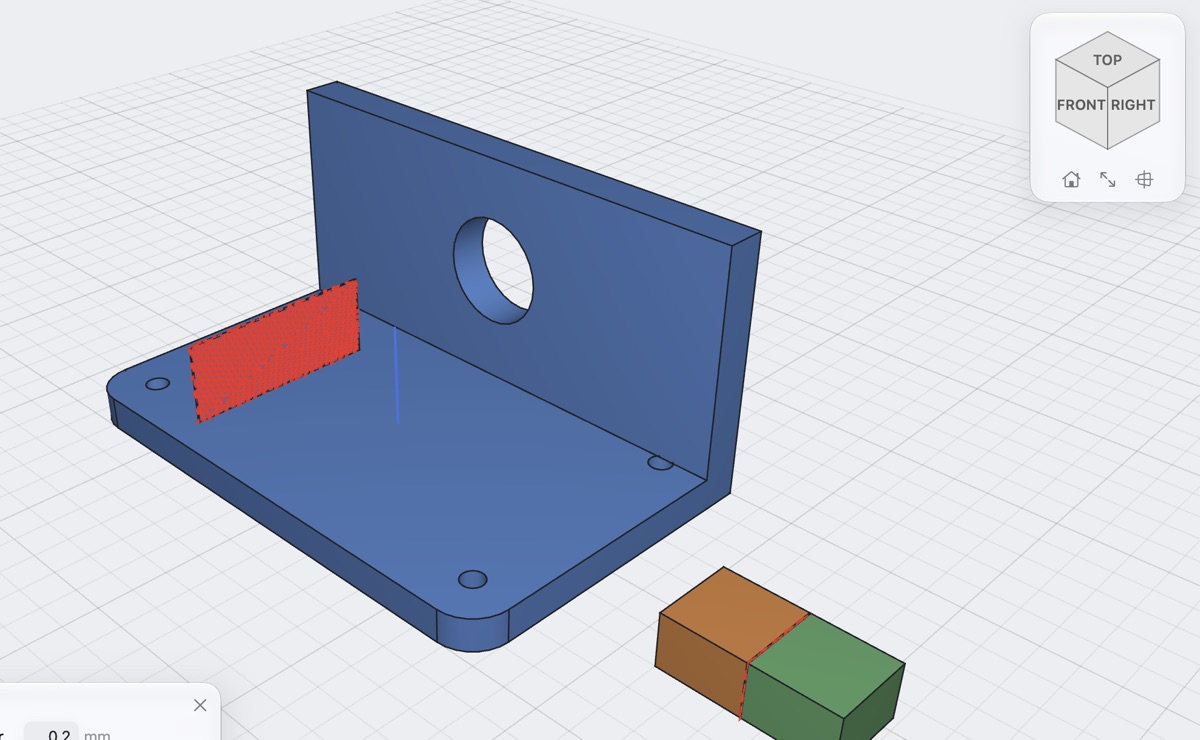
Pick your printer (Bambu Lab, Prusa, Creality, Elegoo) and its bed sits under the model, red where a part sticks out. Lay a part on the face you click, arrange everything on the bed.

Overhangs in red

Faces that lean out past 45° (or your own angle) turn red, so you see where support would go.

No elephant's foot

One click chamfers every edge that touches the bed (0.4 mm), against the first layer's squeeze-out.

Corners that stay down

Brim Ears puts thin discs on sharp corners at the bed, so they do not lift. You snap them off after printing.

Weight before you print

Measure gives volume, filament weight and length for PLA, PETG and other materials.

Too big for the bed

Draw the cut lines and Joint Split makes the pieces with locks. Every piece is its own body, ready to export.

Files your slicer likes

3MF with every body as its own named, coloured object; STL for any printer; STEP for Bambu Studio, PrusaSlicer and OrcaSlicer.

Downloaded models

Change the STL you downloaded

Most things on Printables and MakerWorld are meshes. Bring one in and it becomes a solid you can work on, with its flat faces as real faces, on your Mac, without an online converter.

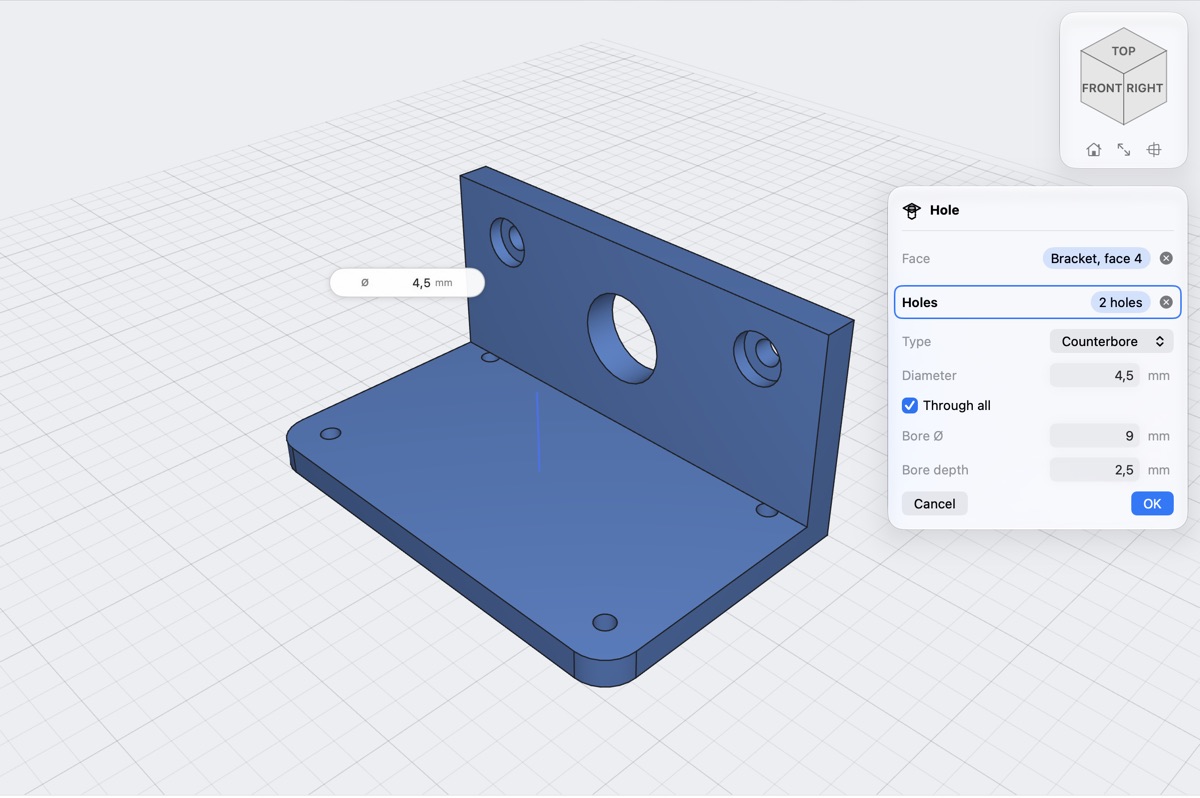
Holes with counterbores placed by clicking on a face
Hole · free

Drill where you click

Click a flat face of the imported part and click where the holes go: simple, counterbore or countersink, through or to a depth.

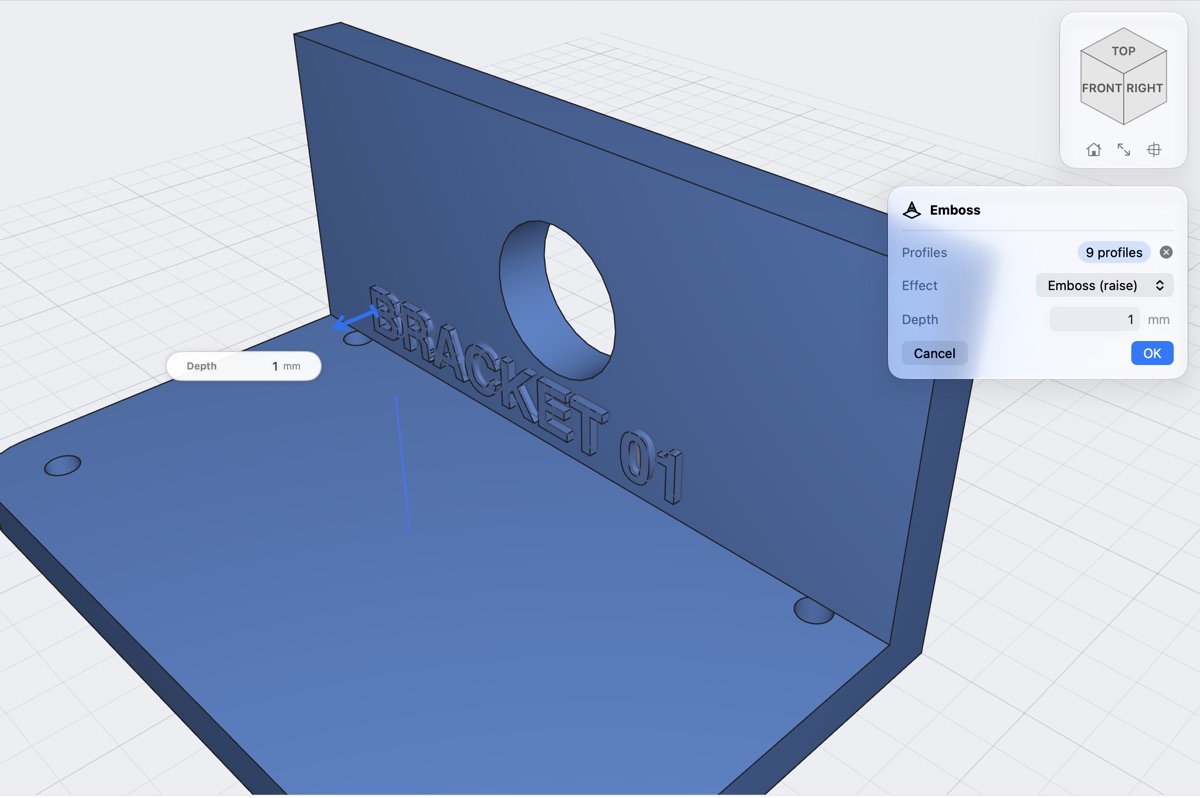
Text raised on a curved face
Emboss · free

Put your name on it

Text and SVG logos raised or sunk into a face, flat or curved, at the depth you type.

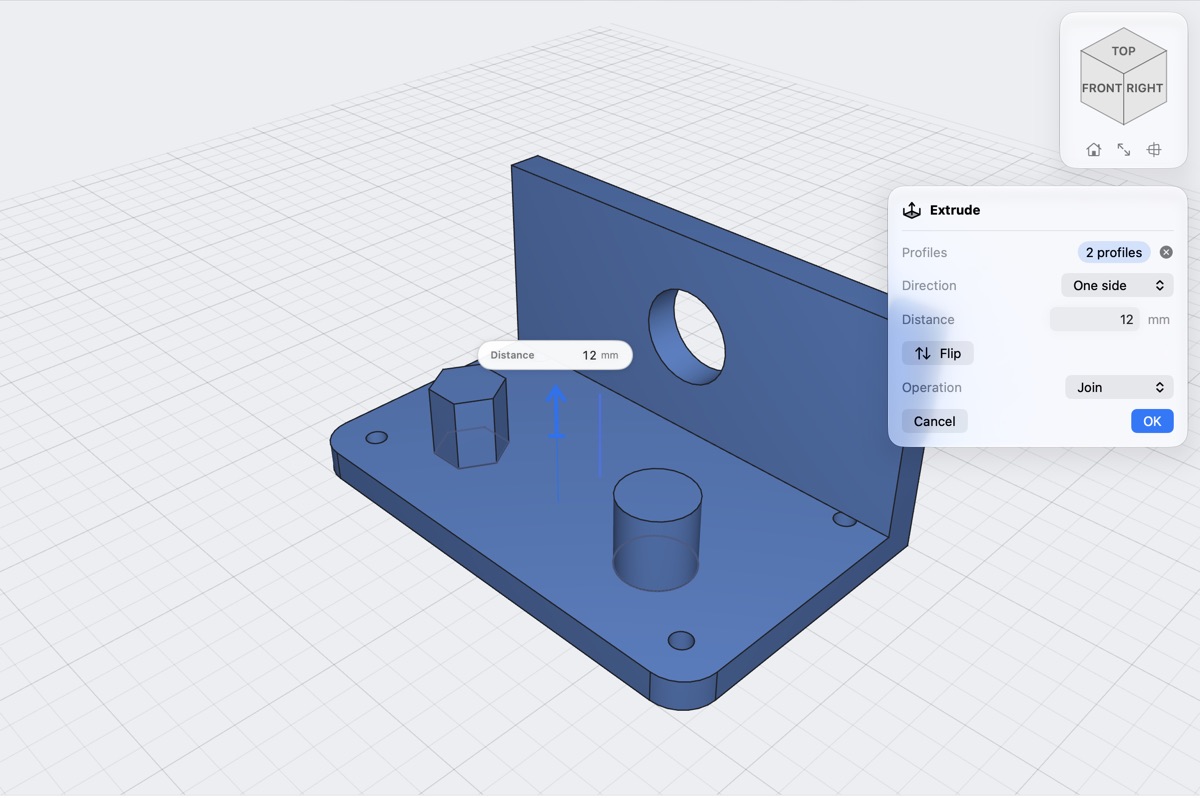
A face being extruded with its arrow and distance box
Extrude · Combine · Split · free

Add, cut, join

Extrude a flat face, sketch on it, cut a slot, join a bracket, split it with a plane. STEP models open with every part a body, with names and colours.

Functional prints

The parts people print most, ready to change

Boxes, bins, jars, enclosures, hooks: the things generators on the model sites make. Here they arrive as ordinary steps in your timeline, so you can still fillet, cut and label them.

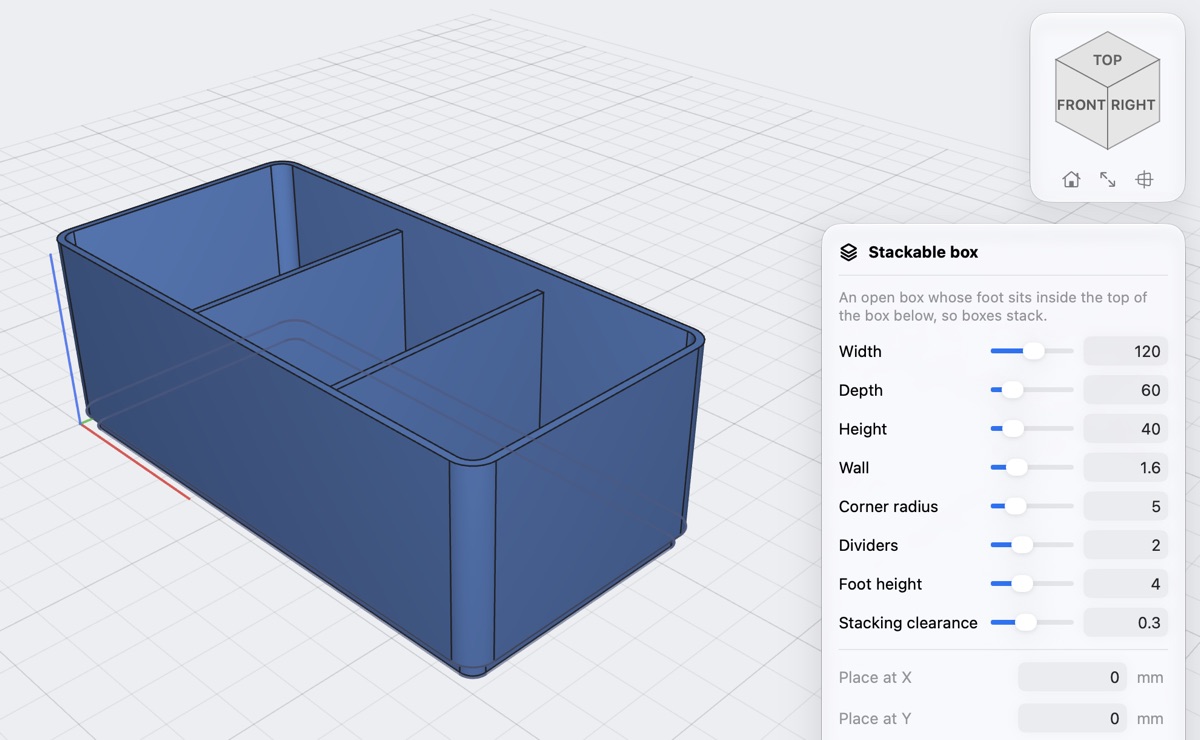
A stackable box with two dividers from the parts library, its values as sliders
Parts library · free

Thirteen parts, values as sliders

Stackable box, drawer tray, Gridfinity-compatible bin and baseplate, screw-top jar, board enclosure, spur gear, knob, wall hook, cable comb, plant pot, name tag and the fit test. Set the sizes, press OK.

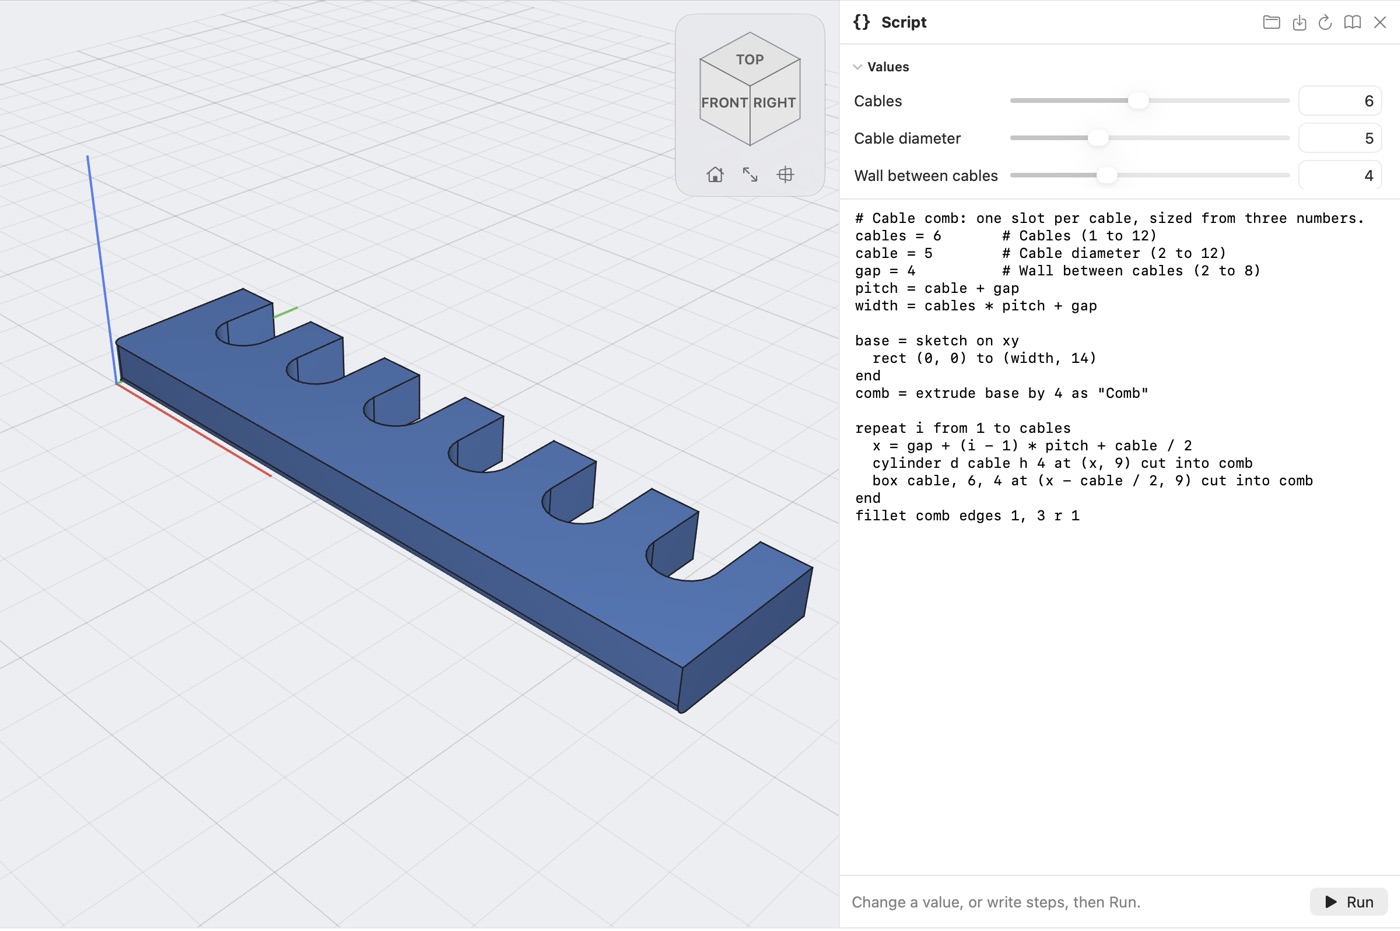
The script panel beside a part, its values as fields and sliders
Scripts · Pro to run

Your own generator

Every project is also a short script. Put a few numbers at the top and they become sliders: six cable slots or ten, one drag. Save it and use it again in any project.

Easy to start

Learn it in an evening, come back after a month

You do not have to define a sketch fully before you can use it. Draw rectangles and lines, type the sizes as you go, and change any step later.

Type sizes where you draw

Width, height, distance and angle boxes sit next to the cursor and the arrows. Type a number or a sum like 40/2+3.

Pick, preview, OK

Every tool works the same way: click what it works on, see the result, drag or type, then OK or Cancel. Nothing changes before OK.

Change your mind

Make an early sketch bigger and the whole part rebuilds, holes and fillets included. Suppress or roll back any step.

Forgot where a tool is?

Press ⌘K and type what you want: "hollow", "screw", "warp". The tool starts.

Yours, offline

No account, no cloud, no limit on projects. They are files in Finder and iCloud Drive.

A hobby price

Modelling is free. Pro is $0.99 a month or $6.99 a year, with a free first week.

Print it right the first time

Download Lets3dPrint and model as much as you like for free. Go Pro when it is time to print.

Download free

macOS 26 or later · Apple silicon